Unlock the Secret to Perfect Sausage Balls: Your Ultimate Guide
Sausage balls are more than just an appetizer; they're a beloved tradition, a crowd-pleaser that effortlessly brings smiles to any gathering. From festive holiday brunches to spirited game day parties, these savory, cheesy, and utterly irresistible bites have earned their place as a staple in countless households. If you’ve yet to experience the magic of a perfectly baked sausage ball, prepare to discover your new favorite snack. This comprehensive guide will walk you through the essential ingredients, offer expert baking tips, and ensure your next batch of homemade sausage balls is nothing short of perfection. Get ready to master the ultimate sausage balls recipe.Key Ingredients: The Foundation of Flavor and Texture
The beauty of a classic sausage balls recipe lies in its simplicity. With just a few core ingredients, you can create a culinary masterpiece. However, understanding the role of each component and the subtle variations available can elevate your sausage balls from good to truly unforgettable.The Star: Your Choice of Sausage
The sausage is, naturally, the heart of this dish. The reference context highlights ground Italian pork sausage (sweet or spicy) as a favorite, and it’s an excellent choice for its robust flavor profile. However, don't limit yourself!- Pork Sausage: Opt for raw, ground pork sausage. If it comes in casings, be sure to remove them completely before mixing. Pre-cooked sausage will not bind correctly and will result in a different, often drier, texture.
- Flavor Variations: Beyond Italian, explore options like maple breakfast sausage for a delightful sweet and savory twist, ideal for brunch. For a bolder, spicier kick, consider ground Mexican chorizo (ensure it's the raw, unsmoked variety, not the Spanish cured kind) or a hot pork sausage blend.
- Lighter Alternatives: For a leaner option without sacrificing much flavor, ground chicken or turkey sausage work wonderfully. Just be mindful that they tend to be less fatty, so ensure your mixture remains adequately moist.
The Binder: Bisquick (or a Savvy Swap)
Bisquick, or a similar boxed biscuit mix, is the ingenious secret to the incredible texture of traditional sausage balls. It provides a convenient blend of flour, leavening, and shortening, creating a tender, biscuit-like crumb that encases the savory sausage and cheese. It’s what makes this appetizer so wonderfully easy and reliable.However, if you prefer a from-scratch approach or simply don't have Bisquick on hand, there's an easy solution. You can create your own biscuit mix substitute by combining:
- 2 cups all-purpose flour
- 3 teaspoons baking powder
- ½ teaspoon salt
The Melter: Irresistible Cheese
Cheddar cheese is the quintessential choice for sausage balls, and for good reason—its sharp, savory notes complement the sausage perfectly and it melts beautifully. Yet, this is an area where you can truly personalize your recipe.- Classic Cheddar: Sharp or extra-sharp cheddar delivers the best flavor punch.
- Elevated Flavor: Stirring in some grated Parmesan can add a sophisticated, salty depth that enhances the overall profile.
- Adventurous Options: Don't hesitate to experiment! Gruyère offers a nutty, complex flavor; Pepper Jack adds a pleasant spice; mozzarella provides a mild, milky stretch; and even a smoked Gouda could introduce an intriguing smokiness. The best part? Most of your favorite shreddable cheeses will likely yield delicious results.
The Moisturizer: Whole Milk
While some early versions of sausage balls might have omitted liquid, the addition of whole milk is a game-changer. In our experience, milk is crucial for preventing the mixture from becoming dry and crumbly. It helps create a more cohesive dough that’s easier to mix and form, and it contributes to a tender, moist interior in the finished product. Don't skip this step – it's vital for achieving the perfect texture.The Seasonings: Parsley & Paprika
Beyond salt and pepper, freshly chopped parsley and paprika add a wonderful layer of flavor and visual appeal. Fresh parsley not only brightens the taste but also serves as a beautiful garnish. Paprika contributes a subtle warmth and a lovely reddish hue, enhancing the golden crust. While dried parsley can work in a pinch, fresh is definitely preferred for its vibrant flavor and texture.Mastering the Mix: Expert Tips for Perfect Sausage Balls
Creating the perfect sausage ball mixture is more art than science, but these tips will guide you to success.Preparation is Key
Before you even touch the ingredients, preheat your oven to 350°F (175°C). Line a baking sheet with parchment paper or a silicone baking mat. This crucial step prevents sticking and ensures easy cleanup, guaranteeing those golden bottoms everyone loves.Mixing for Cohesiveness
In a large mixing bowl, combine your raw ground sausage, Bisquick (or homemade substitute), shredded cheese, milk, fresh parsley, and paprika. Season generously with salt and freshly ground black pepper.The key here is thorough mixing. Use your hands – they are the best tools for the job! Mix until all ingredients are fully combined and the mixture is cohesive. It won't be overly wet, but it should hold together when pressed. If it feels too crumbly, continue mixing, as the warmth of your hands will help soften the sausage fat and cheese, aiding in binding. If still struggling, a tiny splash more milk (a tablespoon at a time) can help, but avoid making it too wet.
Forming the Balls: Consistency Matters
Once your mixture is perfectly combined, it's time to form the balls. A small cookie scoop (about 1.5 to 2 tablespoons) is your best friend here. It ensures uniform size, which promotes even baking. Roll the scooped mixture gently between your palms to create neat, compact balls. If the mixture is still struggling to hold its shape, it's a sign you need to mix it a bit more vigorously. Place the formed balls onto your prepared baking sheet, leaving a small space between each one to allow for airflow.The Golden Touch: Olive Oil Brush
For that irresistible, deeply golden crust, lightly brush the tops of your sausage balls with a little olive oil before baking. This simple step encourages browning and adds a subtle richness that enhances their overall appeal.Baking Your Sausage Balls to Golden Perfection
Baking is the final step to transforming your carefully crafted mixture into the delicious appetizer you crave.Oven Temperature and Time
Bake your sausage balls in the preheated 350°F (175°C) oven. The baking time will typically be around 20-25 minutes, but this can vary depending on your oven and the size of your sausage balls.Checking for Doneness
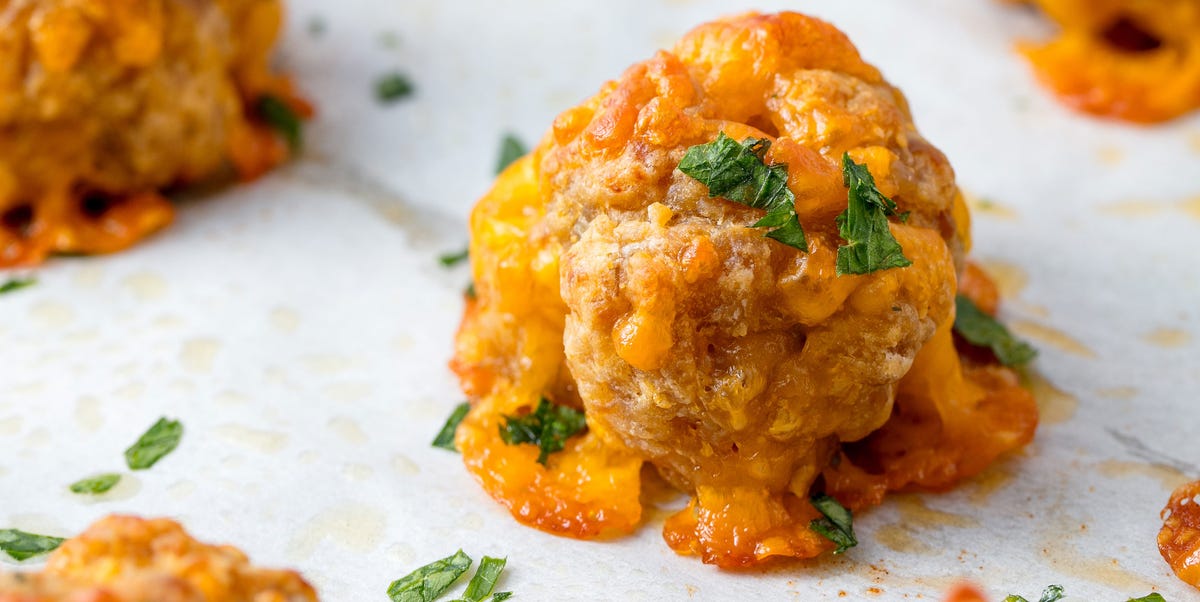
You'll know they're ready when they are deeply golden brown on the outside and no longer pink inside. The cheese should be melted and gooey, and the sausage cooked through. For absolute certainty, you can use an instant-read thermometer to check the internal temperature, which should reach 160°F (71°C).Cooling and Serving
Once baked, remove the sausage balls from the oven and let them cool on the baking sheet for a few minutes before transferring them to a wire rack. Garnish with a sprinkle of fresh parsley just before serving for a pop of color and freshness.Serving Suggestions & Creative Variations
Sausage balls are incredibly versatile. Here are some ideas to make them even more special:- Dipping Sauces: While fantastic on their own, sausage balls pair beautifully with dipping sauces. Consider honey mustard, ranch dressing, marinara sauce, or even a spicy sriracha mayo for an extra kick.
- Breakfast/Brunch Delight: As mentioned, using a maple breakfast sausage transforms these into a delightful sweet and savory treat, perfect for Christmas morning or a leisurely weekend brunch.
- Spicy Kick: Amp up the heat by using hot Italian sausage, adding a pinch of cayenne pepper to the mixture, or opting for pepper Jack cheese.
- Make-Ahead & Freezing: Sausage balls are excellent for meal prep! You can prepare the mixture ahead of time and store it in the refrigerator for up to 24 hours. Alternatively, once formed, you can freeze unbaked sausage balls on a baking sheet until solid, then transfer them to a freezer-safe bag for up to 3 months. Bake from frozen, adding about 5-10 minutes to the baking time.
